Data Sync Client
The Mastr-MS data sync client should be installed on the Windows machine which is connected to the lab instrument.
It runs in the background and uploads experiment data as it is produced by the lab instrument software.
The data sync client includes the well-known rsync tool and uses it to transfer data.
Installation
The Mastr-MS client is packaged as a Windows installer .EXE file. The latest version should be downloaded from:
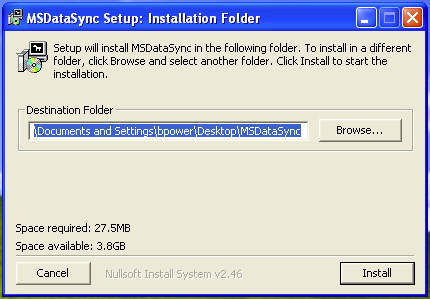
By default the client will be installed to the MSDataSync folder on the desktop.
During installation, a SSH key will be created in
C:\Users\USER\Desktop\MSDataSync\id_rsa.pub (depends on chosen
install folder). This will be used for authentication to the MastrMS
repository.
Starting
To start the data sync client application, open the installation
folder and double click main.exe.
Configuration
Once installed, some configuration is required before the program can be used to sync data. To configure the data sync client, visit the Edit → Preferences menu.
Setting the station identifier
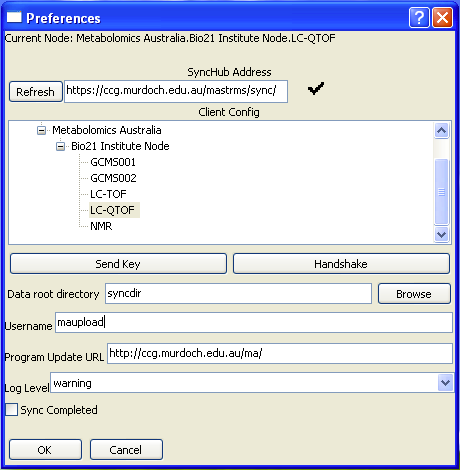
The SyncHub address is the web address of the Mastr-MS installation
with sync/ added on the end. The lab machine needs to be able to
access the SyncHub address over the network.
After entering the SyncHub address, click the Refresh button and then select the appropriate site. The list is categorized by Organisation, then Site/Building/Division, then the machine name.
If your machine is not on the list it will need to be set up on the server first (see Data Sync Node Client Configuration).
Choosing the data sync folder
The next step is to set the location for the client to read data from. Everything under the chosen directory will be analysed to see if it is part of an experiment involving the target machine. Use the Browse button to select the folder containing your data.
Setting the username
The username should be the user which was created when Mastr-MS was set up (see User Creation). It’s used for rsyncing the files. If in doubt, ask your system administrator or contact CCG.
Sending the public key
Click Send Key to upload the generated SSH key. The Mastr-MS server administrator will be e-mailed the key and must then install it (see SSH Key Management). Syncing will not be possible until the key is installed on the server. If the key was successfully sent, the main window will show “Key send response: ok” in the log.
After the administrator has added the key, click the “Handshake” button to test the connection. A black command console box will appear and ask you to type ‘yes’ or ‘no’ to confirm that you want to connect to the server. Type yes to proceed. This is a one time operation. It is a good way to test that public key authentication is working and gets the “Do you want to trust this host?” prompt out of the way.
Performing a manual sync
Click the OK button to save your changes.
The program will periodically sync according to the configured interval. However, as a test, first try a manual data sync.
Choose File → Check Now.
Depending on the contents of the sync directory, and the state of the experiments on the website, files may or may not be synced to the server.
Setting the sync frequency
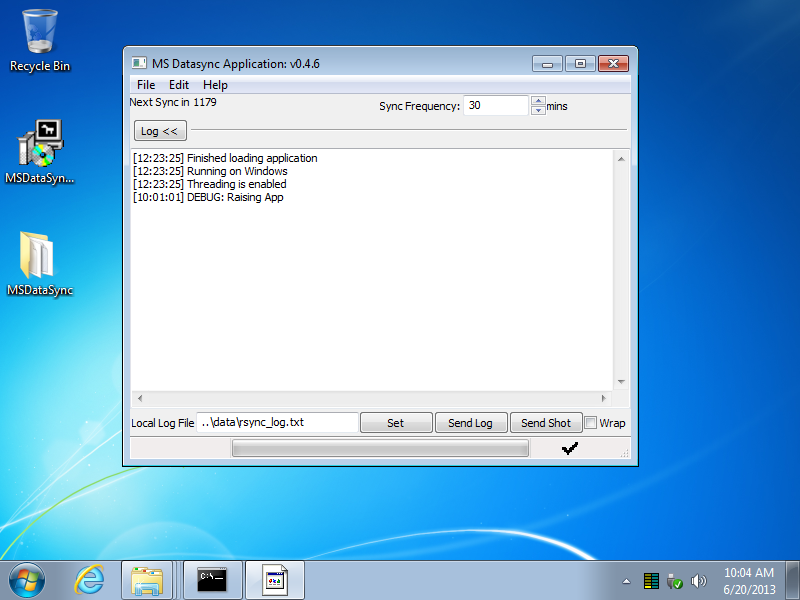
You can set the frequency for syncing in minutes. The default is 30 minutes, meaning that the client attempts to sync data to the server every 30 minutes.
Set and forget
From now on, the client should run automatically.
If you close the client by clicking the [X] in the top corner of the window, or minimise it with File → Minimize, it will still be running in the background. You can tell if the client is running if you see this symbol in the system tray:
To re-open the client window, double click the icon, or right click and select Open Main Window.
To fully quit the program you must choose File → Quit.
Program Updates
Clicking File → Program Updates will check the server to see if any new updates are available. If a new version is available it will be downloaded and applied, and the application must be restarted for the updates to take effect.
Troubleshooting
If there are problems syncing, these will often appear as errors in the log. The log can sometimes reveal the source of the error. It is shown in the main window of the data sync application.
For troubleshooting purposes, the log and/or a screen capture of the client application can be sent to the server administrator using the Send Log and Send Shot buttons.